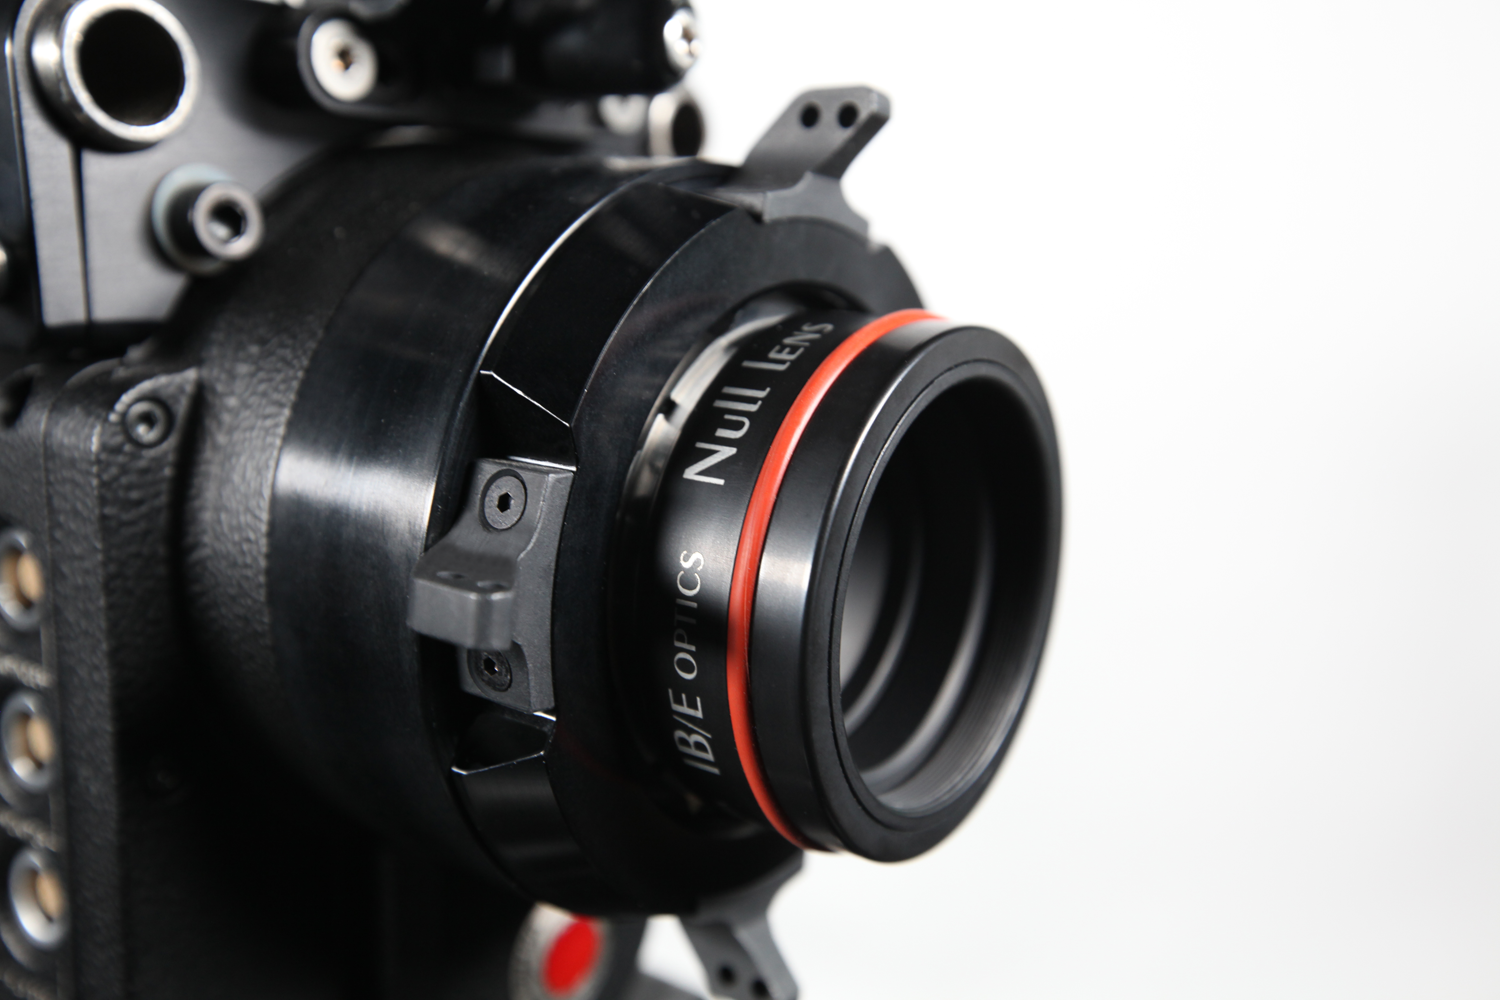
Operating a facility 1500 miles from either Los Angeles or New York can present challenges. After all, we can’t just run down the road and collimate our lenses or check the back focus on our Red One cameras. We have learned to adapt, and in the process built our own rental facility to supply our own needs for top quality equipment and services. But until recently we were still forced to send our cameras and lenses out to check for proper flange focal depth or back focus issues and lens collimation. Fortunately, some new affordable products have become available that allow us to handle this locally. These optical collimation devices allow us to set the PL mount of a digital cinema camera relative to the sensor. Several months ago Abel CineTech released the IB/E Null Lens for the RED One camera. At the time, the Null was the only option shipping – until now. Optitek has released the Optimator. Optitek claims this new tool improves and expands on the Null concept with greater ease of use and makes all tests “laboratory condition” compliant regardless of location. Accuracy really isn’t an issue here, since both devices are accurate to within 5 microns which is literally splitting hairs.
We just got our hands on the Optimator and our tests have proven very promising.
First Impressions
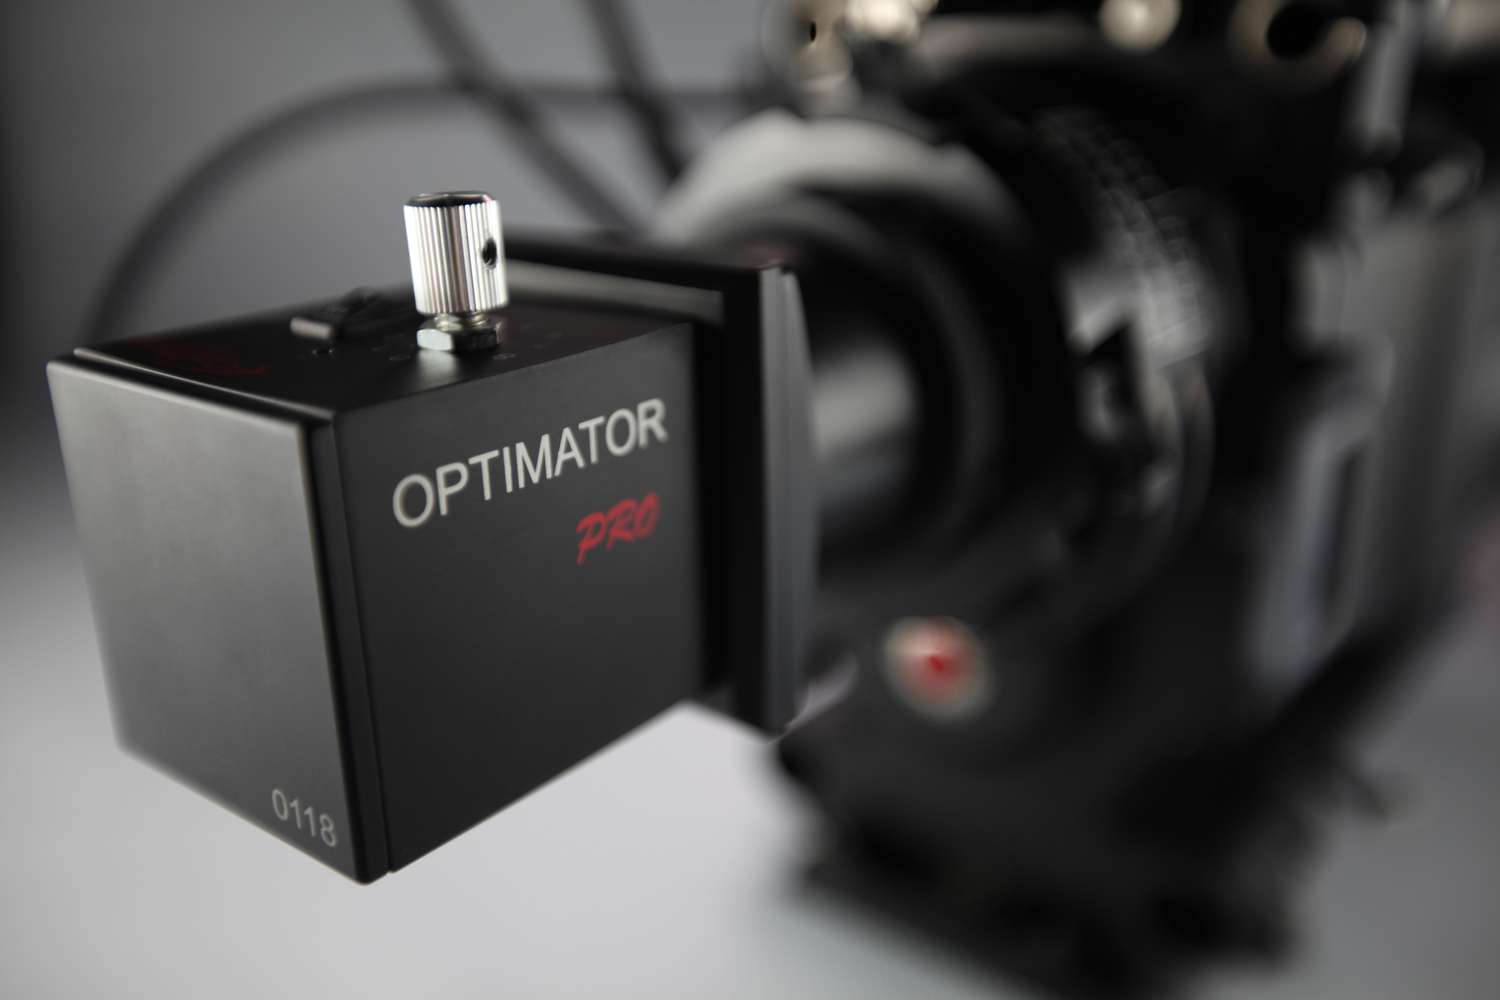
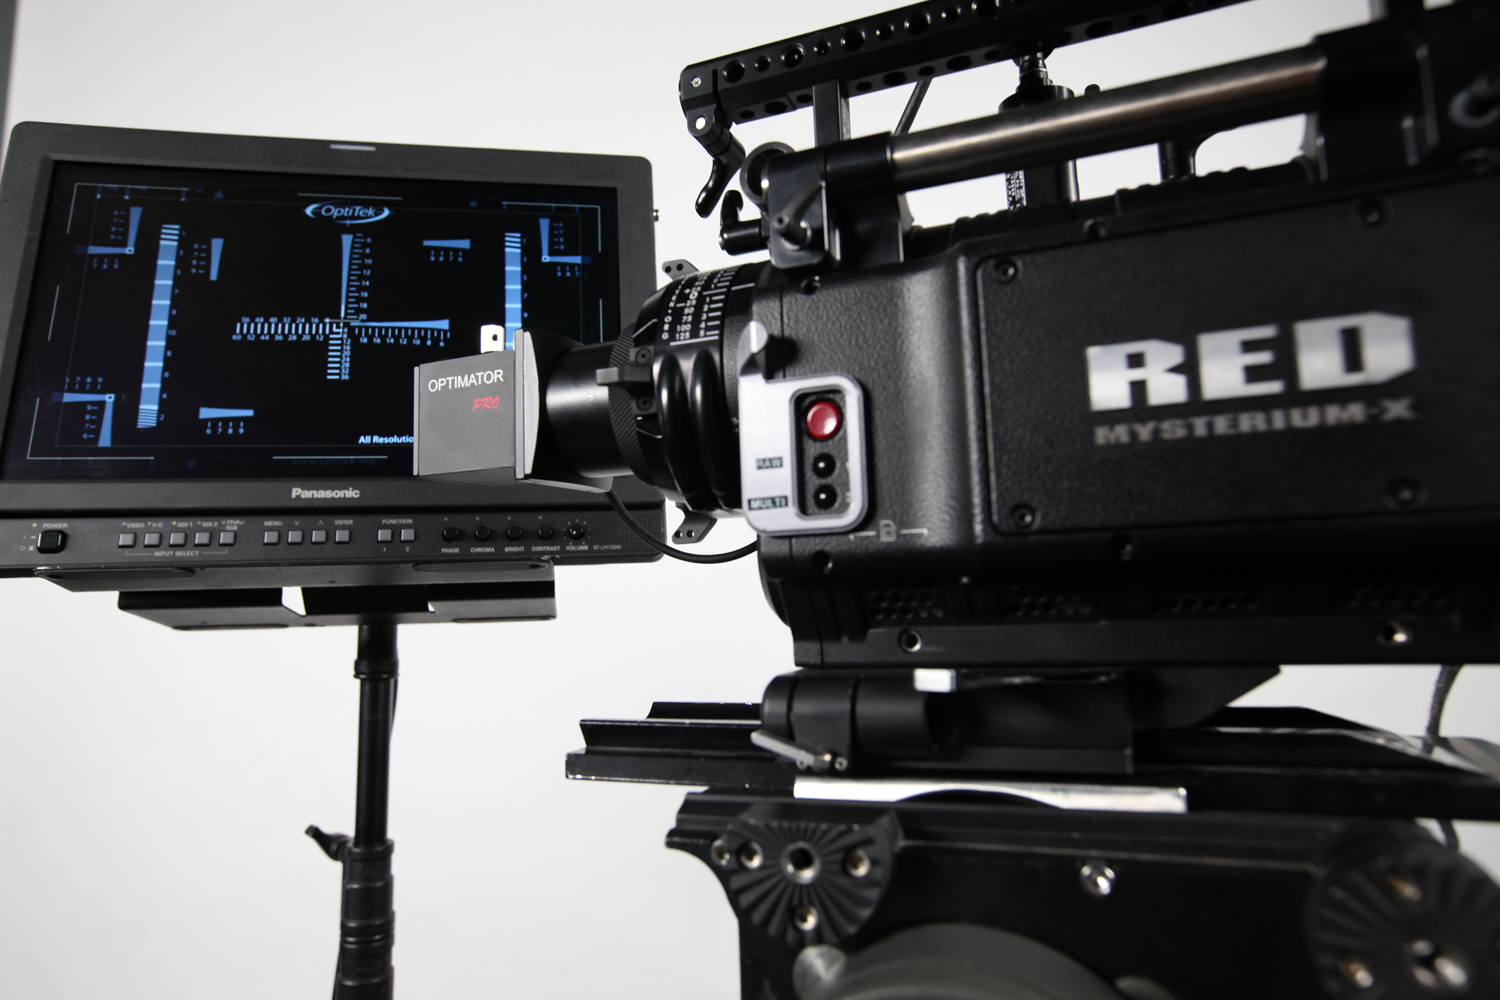
The Optimator is an impressive looking piece of equipment. It has an odd, almost bullet-like shape, and a heft that is surprising considering its size. It’s appears to be well built and very solid. It features a stainless steel optics housing, stainless mount adapters, interchangeable lens mounts and high resolution optics capable of resolving in excess of 5000 lines per inch. Although, I have to note that the first unit shipped to us had to be sent back as it was malfunctioning. Whether this is indicative of the quality of build or not, I can’t say. Only time will tell.
Otherwise, the unit ships in a very nice compact pelican case with two stickers for use on the back focus collar, useful to check the collimation of your lenses.
In Use
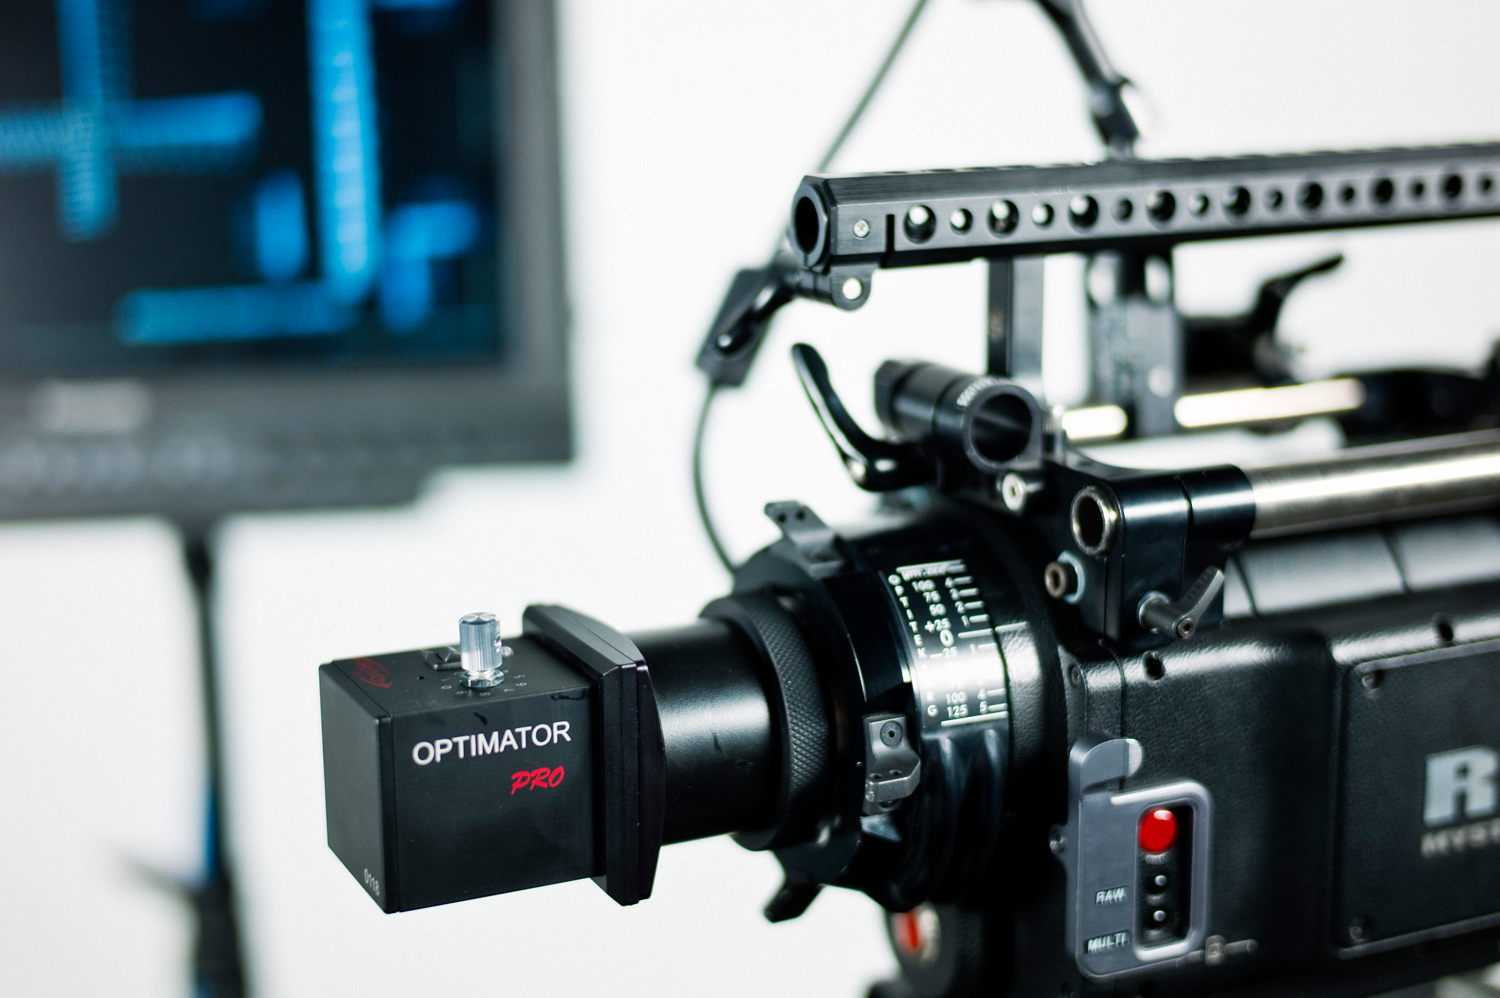
While the Null was a fantastic piece of equipment and certainly serviceable for years to come, it has it drawbacks. The single biggest complaint I’ve always had was that calibrating with the null required a very specific and inconvenient set of circumstances. Because of its super-wide angle lens, it is designed to focus at infinity which forces you to settle on a target at least 50 meters away. If you don’t have a football field for a studio or live in a skyscraper in NYC, it means you have to use it outside. That’s not always feasible and is extremely inconvenient as working outside is not the optimal way to set up a camera. The Optimator, on the other hand, has a built in test chart meaning we could actually use this sucker inside a closet if we had to.
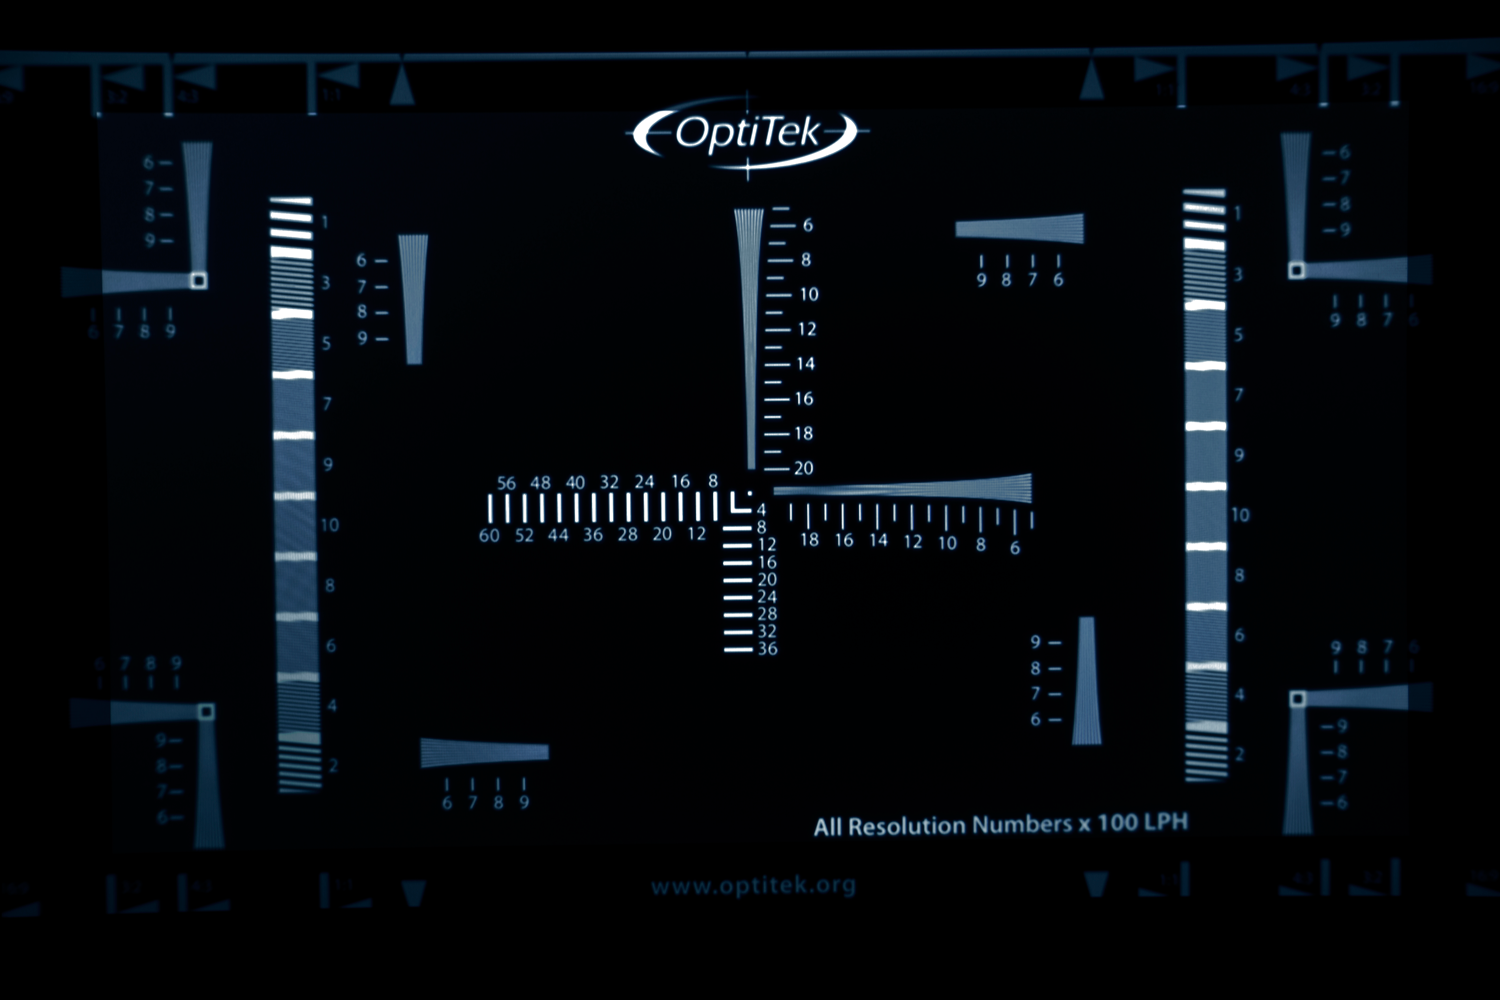
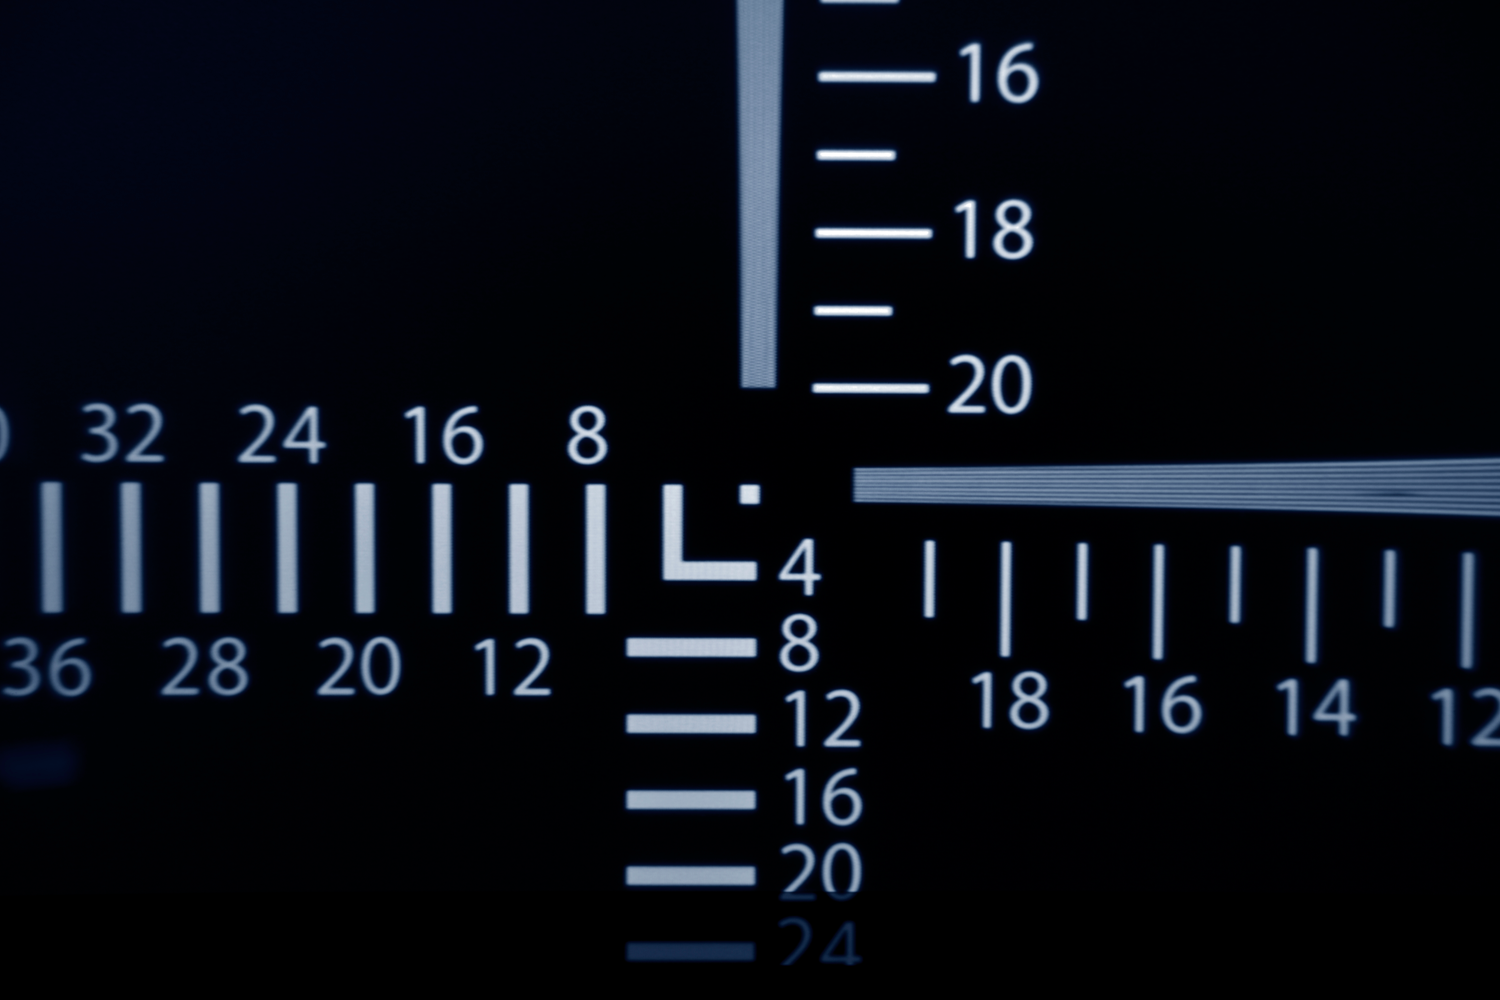
Using the Optimator is a simple process. First, you mount the device and punch in to get a 1 to 1 pixel display. Second, you loosen the collar every so slightly to allow for fine-tuning of the PL mount. The built-in chart is great and allows you adjust the camera distance very quickly. Not only is it convenient but it’s easy to read and its detail leads to extremely accurate calibration. The built-in LED light allows the user to adjust brightness, though we found anything over a setting of 2 blew out the chart and made it basically unusable. The high-resolution targets are particularly useful. This unique target design makes any sensor tilt evident and the center target helps to detect sensor-centering problems. Finally, you tighten the collar back up and remove the Optimator. We were able to properly calibrate the flange focal depth in 10 minutes or less.
Price
Our Optimator unit was priced at $2195. When you compare that to the Null, priced around $1700 without the optional target (an addition the company is making for another $1000, but is still not available), it’s priced very competitively.
Conclusion
On the IB/E website, I’m quoted as saying:
…15 minutes and two Red Ones are now spot on focus. Very cool new tool, which should be considered a must have for any serious Red owner…. for now this is the only option shipping and it works exactly as advertised. Overall, I am very satisfied with the Red Null. It is very simple to use and takes only a few minutes to verify the Red’s backfocus.
I stand by those words. It performs exactly as it should and was the first and best product available for the RED. However, today we have a new contender in the Optimator, which has the Null beat…for now. The Optimator is more convenient and easier to adjust. Once the Null Target ships we’ll see how they compare.
The bottom line is this, when I use the Optimator, our customers are 100% confident that we are providing a perfectly calibrated camera. Confidence in our products, our services and our results is worth its weight in gold.
Null Lens Operation Manual In Video Form:
http://www.youtube.com/watch?v=-Wst6F5CdTA
Optimator Operation Manual In Video Form